How To Install Laminate Flooring
Product Definition
How To Install Laminate Flooring refers to a standardized, engineering-oriented installation methodology for multi-layer laminate flooring systems, ensuring dimensional stability, surface durability, and compliance with commercial and residential construction standards across large-scale and repeatable projects.
Technical Parameters and Specifications
Understanding technical parameters is essential before learning how to install laminate flooring in professional projects.
Panel thickness: 7 mm, 8 mm, 10 mm, 12 mm
Wear resistance class: AC3 / AC4 / AC5 (EN 13329)
HDF core density: 830–900 kg/m³
Locking strength: ≥1,000 N (click-lock systems)
Moisture swelling (24h): ≤18%
Subfloor flatness tolerance: ±3 mm per 2 m
Recommended expansion gap: 8–12 mm
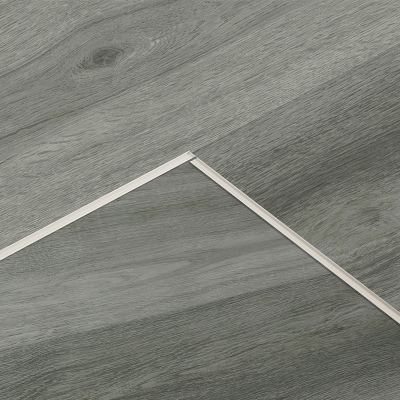
Structure and Material Composition
Before installation, it is critical to understand the structural composition of laminate flooring systems.
Overlay Layer: Melamine resin reinforced with aluminum oxide
Decor Layer: Printed paper defining visual appearance
Core Layer: High-density fiberboard (HDF) for load-bearing
Balancing Layer: Moisture-resistant backing for dimensional stability
Locking Profile: Precision-milled mechanical click system
Manufacturing Process Background
Although this article focuses on how to install laminate flooring, installation quality is directly linked to manufacturing processes.
Wood fiber refining and HDF board pressing
Decor paper impregnation with melamine resin
High-pressure hot pressing (180–200°C)
Surface embossing and abrasion enhancement
CNC profiling of locking systems
Final inspection and packaging
Industry Comparison
| Flooring Type | Laminate | Engineered Wood | LVT / SPC | Ceramic Tile |
|---|---|---|---|---|
| Installation Method | Floating Click | Glue / Nail | Click / Glue | Mortar |
| Installation Speed | Fast | Moderate | Fast | Slow |
| Subfloor Tolerance | Medium | Low | High | Low |
| Maintenance | Low | Medium | Low | Low |
Application Scenarios
Professional understanding of how to install laminate flooring is required across multiple B2B user groups.
Distributors: Demonstration installations and technical training
EPC contractors: Fast-track commercial and residential projects
Engineering firms: Specification-driven installations
Developers: Cost-controlled flooring solutions
Core Pain Points and Engineering Solutions
Uneven subfloors: Solved by self-leveling compounds
Edge lifting: Prevented with proper expansion gaps
Click-lock failure: Avoided by angle-lock installation sequence
Moisture damage: Mitigated through vapor barriers and acclimation
Risk Warnings and Mitigation Measures
When learning how to install laminate flooring, ignoring risk factors can compromise long-term performance.
Do not install over wet or uncured concrete
Avoid direct installation in areas with standing water
Control ambient humidity between 40%–65%
Use PE vapor barriers ≥0.2 mm thickness
Procurement and Selection Guide
Define traffic load and AC rating requirements
Select appropriate thickness based on subfloor condition
Verify locking system test data
Confirm compatibility with underfloor heating
Request installation manuals and technical drawings
Evaluate supplier consistency and batch stability
Conduct pilot installation or mock-up testing
Engineering Case Application
In a 12,000 m² office renovation project, contractors applied standardized procedures on how to install laminate flooring using 8 mm AC4 panels. Floating installation over leveled concrete subfloors reduced project duration by 28% compared to ceramic tiles, while meeting acoustic and durability requirements.
FAQ
Q1: Can laminate flooring be installed over concrete? A: Yes, with a vapor barrier.
Q2: Is glue required? A: No, modern systems use click-lock installation.
Q3: What expansion gap is required? A: Typically 8–12 mm.
Q4: Can it be installed over existing tiles? A: Yes, if flat and stable.
Q5: Is underfloor heating compatible? A: Yes, within temperature limits.
Q6: How long should acclimation take? A: 48 hours minimum.
Q7: What tools are required? A: Spacers, tapping block, pull bar, saw.
Q8: Can damaged planks be replaced? A: Yes, with partial disassembly.
Q9: What is the service life? A: 10–20 years depending on use.
Q10: Is professional installation required? A: Recommended for large projects.
Call to Action
For detailed installation manuals, technical data sheets, engineering samples, or project-based quotations related to how to install laminate flooring, procurement and engineering teams are encouraged to request official technical documentation.
E-E-A-T Author Credentials
This content is prepared by a building materials technical consultant with over 15 years of experience in flooring systems, construction engineering standards, and B2B procurement advisory for international projects.