DIY Wood Flooring Installation | FLOORMAKER
Installing wood flooring yourself is a rewarding project that can elevate your home’s aesthetic while saving on labor costs. Among the myriad of installation patterns, fishbone , chevron (herringbone’s bold cousin), and straight lay stand out as timeless favorites. In this guide, we’ll break down how to tackle these styles, their unique challenges, and tips to ensure a professional-looking finish—even for DIY beginners.
Why Your Flooring Pattern Choice Matters
The pattern you choose impacts:
Visual appeal: Intricate designs like fishbone add luxury, while straight lay offers understated elegance.
Room perception: Chevron elongates spaces; fishbone creates dynamic movement.
DIY difficulty: Straight lay is beginner-friendly, while angled patterns demand precision.
Tools & Materials Checklist
Engineered wood or laminate planks (15% extra for angled patterns)
Underlayment (moisture-resistant for basements)
Circular saw/miter saw (for precise angle cuts)
Spacers, tapping block, pull bar
Laser level/chalk line (to maintain straight guidelines)
Wood glue/nail gun (optional for added stability)

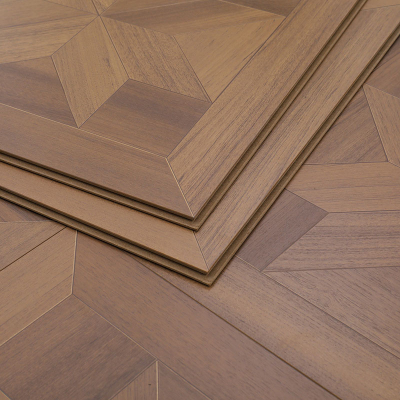
1. Fishbone Pattern: Classic Sophistication
What’s the difference?
Fishbone : Rectangular planks cut at 90° angles, creating a staggered zigzag.
Chevron: Planks cut at 45° angles, forming sharp, continuous “V” shapes.
Skill Level: Intermediate/Advanced
Steps for Fishbone:
Plan the layout: Start at the room’s center. Use a laser level to mark perpendicular guidelines.
Cut planks: Trim planks to 45° angles for tight joints.
Lay the first row: Place two planks at 90° to form a “L” shape. Secure with wood glue or click-lock systems.
Build outward: Alternate plank directions, ensuring seams align perfectly.
Trim edges: Use a jigsaw for clean cuts around walls.
Pros: Timeless, hides subfloor imperfections.
Cons: High material waste (up to 20%), time-consuming.
Pro Tip: Use pre-cut herringbone vinyl planks for a beginner-friendly alternative.

2. Chevron Pattern: Bold & Modern
Skill Level: Advanced
Steps:
Pre-cut planks: Trim ends to 45° angles, creating parallelograms.
Dry-fit the “V”: Align two planks tip-to-tip to form a sharp “V” shape.
Stagger rows: Offset each “V” by 1/3 of the plank length to avoid weak seams.
Secure with adhesive: Apply wood glue to the tongue-and-groove edges for extra hold.
Pros: Dramatic focal point, ideal for entryways.
Cons: Requires meticulous cutting; mistakes are highly visible.
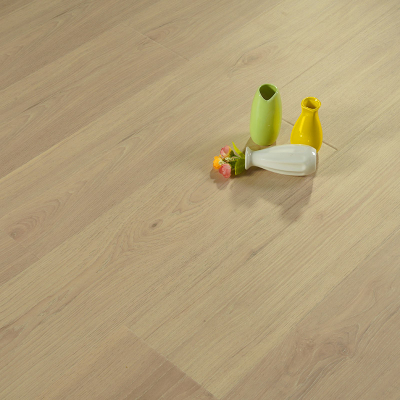
3. Straight Lay: Effortless Simplicity
What it is: Planks run parallel to walls, with seams staggered randomly or in a 1/3 offset pattern.
Skill Level: Beginner
Steps:
Start along the longest wall: Place spacers to maintain 10mm expansion gaps.
Stagger seams: Begin each new row with a plank cut to 1/2 or 1/3 the length of the previous row’s starter.
Lock planks: Use a tapping block to gently connect click-lock systems.
Pros: Minimal waste, quick installation, suits large rooms.
Cons: Can emphasize uneven subfloors.

Choosing the Right Pattern for Your Space
Small rooms: Chevron or fishbone to create illusion of space.
High-traffic areas: Durable straight lay with a 1/3 stagger.
Statement floors: Opt for fishbone in living rooms or dining areas.
Pro Tips to Avoid Costly Mistakes
Acclimate planks: Let wood adjust to room humidity for 48+ hours.
Check subfloor flatness: Fill gaps >3mm with leveling compound.
Pre-sort planks: Mix shades/grains for a natural look (especially in straight lay).
Use spacers religiously: Temperature changes cause expansion—gaps prevent buckling.
Common DIY Pitfalls
Ignoring pattern direction: Angled patterns should align with natural light sources.
Rushing cuts: Measure twice, cut once—especially for chevron angles.
Skipping underlayment: Reduces noise and extends floor lifespan.
Final Thoughts
Whether you crave the drama of chevron, the elegance of fishbone, or the simplicity of straight lay, success lies in careful planning and patience. For complex patterns, practice on a small section (like a closet) first. Share your DIY journey in the comments—we’d love to see your results!