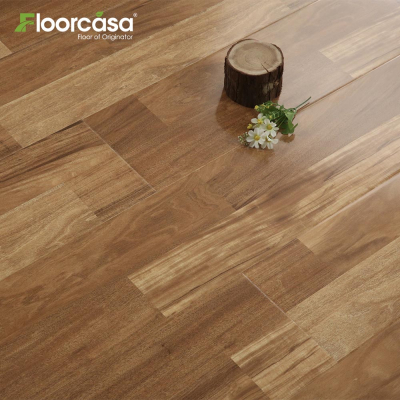
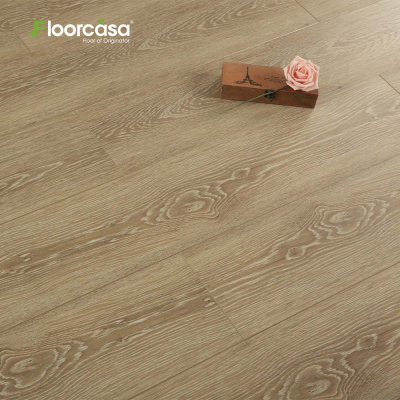
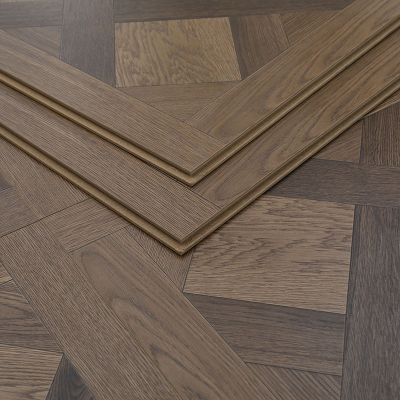
Click lock vinyl flooring installation
What Is Click Lock Vinyl Flooring Installation
Click lock vinyl flooring installation is a mechanical, adhesive-free method of assembling rigid or flexible vinyl planks (SPC, WPC, or LVT) where pre-milled tongue-and-groove profiles—typically angle-angle (20–30° engagement) or drop-lock (vertical engagement)—are mechanically engaged to create a floating floor system that is not attached to the subfloor. From an engineering and construction perspective, click lock installation is not a simple assembly operation but a critical system integration process involving subfloor preparation, moisture vapour control, thermal expansion management, and mechanical locking integrity that determines the floor's long-term performance and failure resistance. The system relies on the mechanical interlock of the profile—the tongue of one plank engages the groove of the adjacent plank, creating a joint with a specified tensile strength (typically ≥800 N/m linear, EN 13329) that resists separation under foot traffic, thermal movement, and rolling loads.
The material structure of click lock vinyl planks consists of: a wear layer (0.20–0.55 mm, Al₂O₃ 30–50 g/m² for scratch resistance); a printed decorative layer (0.07–0.10 mm); a rigid or flexible core (SPC: 1.8–2.2 g/cm³, LVT: 1.2–1.5 g/cm³); a backing layer (foam, cork, or felt for acoustic insulation); and the click lock profile—milled with a tolerance of ±0.05 mm. The profile geometry determines the installation method: angle-angle requires inserting the tongue at a 20–30° angle and lowering it flat; drop-lock requires dropping the plank vertically to engage the lock. The mechanical lock's structural behaviour under load is governed by the profile's geometry and the core material's flexural modulus—SPC (1,200–2,000 MPa) provides higher joint strength than LVT (500–800 MPa).
The essential distinction between click lock vinyl installation and glue-down installation is the absence of adhesive and the floating nature of the finished floor. Glue-down installation bonds the flooring directly to the subfloor—providing excellent dimensional stability and load resistance, but requiring adhesive application, curing time (24–72 hours), and extensive subfloor preparation. Click lock installation is faster (150–250 m²/day versus 100–150 m²/day for glue-down), requires less subfloor preparation, and allows the floor to expand and contract independently of the subfloor (accommodating thermal and moisture movement). However, click lock floors are more susceptible to shifting under heavy loads (trolleys, heavy furniture) and joint separation under thermal cycling if expansion gaps are insufficient.
The original engineering purpose of click lock vinyl flooring installation was to provide a rapid, low-skilled, and cost-effective flooring system for residential and commercial applications. Traditional glue-down vinyl required skilled installers, adhesive application, and 24–72 hours curing time—delaying project completion. Click lock installation reduced installation time by 40–60%, eliminated adhesive costs and VOC emissions, and enabled DIY installation. The system has become the standard for SPC and laminate flooring, with over 80% of residential and 60% of commercial vinyl flooring installed using click lock methods.
Manufacturing Process and Profile Design
The manufacturing process of click lock vinyl flooring determines the installation method and joint integrity.
Core Formation: PVC resin (30–50%), calcium carbonate filler (30–70%), plasticisers (0–30%), and stabilisers are compounded and calendered or extruded into a sheet of the required thickness (2.0–6.5 mm). The sheet is cooled (5–8°C/minute) to achieve dimensional stability. For SPC, the core is rigid (1.8–2.2 g/cm³); for LVT, the core is flexible (1.2–1.5 g/cm³).
Decorative and Wear Layer Lamination: The decorative layer (0.07–0.10 mm) and wear layer (0.20–0.55 mm, Al₂O₃ 30–50 g/m²) are laminated under heat (120–150°C) and pressure (2–3 MPa). The wear layer is UV-cured.
Click Lock Profiling: The click lock profile is milled using high-speed CNC routers or specialised profilers. The profile geometry is critical: angle-angle profiles (Uniclic, Valinge) require a 20–30° angle insertion; drop-lock profiles require vertical engagement. The profile is milled with a tolerance of ±0.05 mm—variation >0.05 mm causes joint gapping or binding. Joint strength is ≥800 N/m linear for commercial applications.
Edge Sealing: For waterproof products, the profiled edges are treated with hydrophobic wax or resin to prevent moisture ingress at the joints—critical for kitchens and bathrooms.
Why Manufacturing Affects Installation: A contractor installed click lock SPC with a damaged profile (tolerance >0.10 mm) in a 500 m² retail store. The joints were loose—gaps appeared within 6 months. The manufacturer replaced the batch, but the contractor incurred £10,000 in labour. The manufacturing specification (profile tolerance) determined the installation outcome.
Technical Specifications for Click Lock Installation
Click lock vinyl flooring must meet specific technical requirements for successful installation.
Thickness: 2.0–6.5 mm. Thicker products (5.0–6.5 mm) provide better joint strength, point-load resistance, and acoustic insulation. Thinner products (2.0–3.0 mm) require more subfloor preparation (flatness ≤1.5 mm over 2 m).
Joint Strength: ≥800 N/m linear (EN 13329) for commercial applications; ≥600 N/m for residential. The joint strength is a function of the profile geometry and core material—SPC provides higher joint strength than LVT.
Dimensional Stability: Thermal expansion coefficient: SPC ≤0.08 mm/m/°C; LVT ≤0.15 mm/m/°C. The expansion coefficient determines the required expansion gap—SPC requires smaller gaps than LVT.
Profile Type: Angle-angle (Uniclic, Valinge) or drop-lock. Angle-angle is more common for SPC (higher joint strength); drop-lock is common for LVT (easier installation). The installer must be familiar with the profile type.
Subfloor Tolerance: Flatness ≤2 mm over 2 m (EN 13329) for SPC; ≤3 mm over 2 m for LVT. Moisture content ≤2.5% (SPC), ≤2.0% (LVT).
Environmental Limits: Installation temperature 15–30°C; RH 40–65%. The product must be acclimatised for 48–72 hours.
Advantages of Click Lock Vinyl Installation in Real Projects
Project data demonstrates the engineering and financial benefits of click lock installation.
Residential Performance (Single-Family): A 200-home development specified click lock SPC (5.5 mm, 0.55 mm wear layer) for all ground floors. Installation rate: 180 m²/day per crew—40% faster than glue-down LVT (120 m²/day). Over 5 years, failure rate (joint separation, wear) was 0.2%—comparable to glue-down. The developer saved £40,000 in labour costs.
Commercial Performance (Retail Stores): A 50-store retail chain specified click lock SPC (6.5 mm, 0.55 mm wear layer) for all stores. Installation rate: 200 m²/day—the chain opened stores 2 weeks earlier than scheduled, generating £50,000 in additional revenue. Over 3 years, failure rate was 0.1%.
Installation Speed: Click lock installs at 150–250 m²/day—2× faster than glue-down (100–150 m²/day) and 3–4× faster than tile (50–100 m²/day). For a 1,000 m² project, click lock takes 4–7 days; glue-down takes 7–10 days; tile takes 10–20 days. The faster installation reduces labour cost by 30–50% and accelerates occupancy.
Adhesive-Free Installation: Click lock eliminates adhesive—reducing VOC emissions, eliminating curing time (24–72 hours), and enabling immediate foot traffic. This is critical for commercial projects (retail stores, hotels) where downtime costs are high.
Maintenance and Replacement: Click lock floors are replaceable—damaged planks can be lifted and replaced without removing the entire floor. Glue-down floors require complete removal of the affected area. A retailer reported saving £8,000 in replacement costs by using click lock SPC versus glue-down LVT.
Real Failure Logic: A hotel installed click lock LVT (2.0 mm, 0.30 mm wear layer) in 200 guest rooms. The installer did not acclimatise the product (72 hours required) and used insufficient expansion gaps. Within 12 months, joints gapped (0.5–1.5 mm) and the floor buckled in 15 rooms. The hotel replaced the flooring with click lock SPC (5.5 mm, 0.55 mm wear layer) and followed the installation protocol—the product has performed without issue for 3 years. The cost of remediation (£20,000) exceeded the cost of proper installation (£5,000).
Click Lock Vinyl vs Alternative Installation Methods
Comparison with alternative installation methods provides selection criteria for procurement engineers.
System A: Click Lock vs System B: Glue-Down
Click lock cost: $25–35/m² (material + installation); glue-down: $28–40/m². Installation speed: click lock 150–250 m²/day; glue-down 100–150 m²/day. VOC emissions: click lock low; glue-down moderate (adhesive VOCs). Replaceability: click lock replaceable; glue-down difficult. Failure risk: click lock <0.5% at 5 years (with proper installation); glue-down <0.5% at 5 years. The premium for glue-down (10–20% higher cost) is justified for heavy commercial applications (forklifts, wet areas) where dimensional stability is critical.
System C: Click Lock vs System D: Loose Lay
Click lock cost: $25–35/m²; loose lay: $18–30/m². Installation speed: click lock 150–250 m²/day; loose lay 200–400 m²/day (faster). Joint integrity: click lock mechanical lock (≥800 N/m); loose lay friction-based (COF ≥0.5). Failure risk: click lock <0.5% at 5 years; loose lay 1–2% at 5 years (shifting, wrinkling). The premium for click lock (10–20% higher cost) is justified for commercial applications requiring joint integrity (retail, hotels, offices).
System E: Click Lock vs System F: Nail-Down (Engineered Timber)
Click lock cost: $25–35/m²; nail-down timber: $35–55/m². Installation speed: click lock 150–250 m²/day; nail-down 100–150 m²/day. Failure risk: click lock <0.5% at 5 years; timber 2–5% at 5 years (moisture, scratching). Click lock is faster, lower cost, and more moisture-resistant—preferred for most residential and commercial applications.
Application Scenarios for Click Lock Vinyl Installation
Click lock vinyl installation is suitable for multiple applications, each with specific requirements.
Residential (Single-Family, Multi-Family): Living areas, bedrooms, kitchens, hallways—SPC 5.0–5.5 mm, 0.30–0.55 mm wear layer, click lock. Selection rationale: rapid installation, low maintenance, DIY-friendly, replaceable. Risks: subfloor moisture (install vapour barrier), expansion gaps (calculate), heavy furniture. Conditions to control: specify SPC; install vapour barrier; maintain expansion gaps; provide cleaning guidelines.
Hotel and Hospitality: Guest rooms, corridors, meeting rooms—SPC 5.5–6.5 mm, 0.55 mm wear layer, click lock, gasket joints. Selection rationale: rapid installation (minimise guest disruption), replaceable, low maintenance. Risks: luggage traffic, cleaning chemicals, expansion gaps. Conditions to control: specify 0.55 mm wear layer; install expansion profiles; provide cleaning guidelines.
Office and Commercial: Corporate offices, government buildings—SPC 5.5 mm, 0.55 mm wear layer, click lock. Selection rationale: rapid installation, professional appearance, low maintenance. Risks: rolling chairs (wear), furniture movement. Conditions to control: specify 0.55 mm wear layer; use furniture pads; maintain expansion gaps.
Retail Environments: Shopping centres, supermarkets—SPC 5.5–6.5 mm, 0.55 mm wear layer, click lock, R10–R11 slip resistance. Selection rationale: rapid installation, durability, low maintenance. Risks: heavy trolley traffic, spills, high foot traffic. Conditions to control: specify 0.55 mm wear layer; install expansion profiles; provide cleaning guidelines.
Rental and Renovation Projects: Quick-fit conversions, temporary offices—SPC 5.0 mm, 0.30–0.55 mm wear layer, click lock. Selection rationale: rapid installation, low cost, replaceable. Risks: subfloor contamination, limited acclimatisation. Conditions to control: specify SPC; install vapour barrier; maintain expansion gaps; provide cleaning guidelines.
Installation Guide for Click Lock Vinyl Flooring
Click lock vinyl installation requires systematic subfloor preparation, acclimatisation, and expansion gap management.
Subfloor Preparation Standards: Concrete subfloor moisture content ≤2.5% (SPC), ≤2.0% (LVT) (CM method). Relative humidity ≤85% (ASTM F2170). Flatness tolerance: ≤2 mm over 2 m (SPC), ≤3 mm over 2 m (LVT). Remove curing compound, oil, grease—grinding or shot-blasting is required. Fill cracks >1 mm with epoxy or cementitious filler.
Moisture Control: Vapour barrier (6 mil polyethylene) is required for all ground-floor installations. Tape seams with 200 mm overlap; extend barrier 50 mm up walls. For basement installations, the vapour barrier is mandatory.
Acclimatisation Protocol: 48–72 hours at 18–25°C, 40–60% RH. The product must be stored in the installation room, with packaging opened. Acclimatisation reduces post-installation movement (gapping or buckling).
Expansion Gap Logic: SPC gap (mm) = room length (m) × 0.08 mm/m/°C × ΔT × 1.2. LVT gap (mm) = room length (m) × 0.15 × ΔT × 1.2. For a 15 m room, SPC ΔT = 20°C: gap = 15 × 0.08 × 20 × 1.2 = 28.8 mm—install expansion profiles at 5–8 m intervals. The expansion gap must be maintained at all walls, doorways, and fixed objects.
Installation Method Steps:
Acclimatise product 48–72 hours; verify flatness (≤2 mm over 2 m) and moisture (≤2.5%).
Install vapour barrier (ground floors) with taped seams; extend 50 mm up walls.
Install underlayment (2–3 mm foam—optional but recommended for comfort and acoustic).
Start installation from the longest wall; maintain 15–20 mm expansion gap at all walls.
For rooms >8 m, install expansion profiles at 5–8 m intervals.
For angle-angle profiles: insert the tongue at a 20–30° angle and lower the plank flat.
For drop-lock profiles: drop the plank vertically to engage the lock.
Use a tapping block (not mallet directly on the joint) to engage locks—avoid over-tapping.
Install transition profiles at doorways (5–8 mm gap).
Seal the perimeter with silicone (bathroom/kitchen-grade sealant) to prevent water ingress.
Fastening and Locking Logic: The click lock profile relies on the mechanical interlock—the tongue of one plank engages the groove of the adjacent plank. For angle-angle profiles, insert the tongue at 20–30° and lower; for drop-lock, drop vertically. Use a tapping block to ensure full engagement—over-tapping can deform the profile; under-tapping creates weak joints.
Common Installation Mistakes:
Expansion gaps insufficient—floor buckles or gaps under thermal movement.
Vapour barrier omitted on ground floors—moisture vapour migrates, causing adhesive failure and mould.
Subfloor flatness inadequate—lipping at joints, visible under light.
Acclimatisation insufficient—post-installation movement (gapping or buckling).
Underlayment not installed—poor acoustic performance; floor transmits impact noise.
Perimeter seal omitted—water enters the expansion gap, causing mould and subfloor damage.
Common Problems and Solutions
Field-observed failures in click lock vinyl installations provide practical lessons.
Joint Gapping
Cause: Insufficient expansion gaps; thermal movement exceeds gap capacity; profile damaged.
Symptom: Gaps at short joints (0.5–2.0 mm); visible in heating or cooling seasons.
Solution: For gaps under 1.5 mm, use colour-matched filler; for gaps >1.5 mm, replace boards.
Prevention: Calculate expansion gaps correctly; inspect profiles before installation; install expansion profiles.
Buckling
Cause: Insufficient expansion gaps—floor expands and pushes against walls.
Symptom: Visible buckling (2–10 mm upward); gaps at walls absent.
Solution: Remove skirting; cut the floor back to create the required expansion gap; reinstall skirting.
Prevention: Calculate expansion gaps using room length, ΔT, and thermal coefficient; install expansion profiles.
Lipping
Cause: Subfloor flatness >2 mm over 2 m; thickness variation between planks.
Symptom: Visible lipping (0.2–1.0 mm) at joints; visible under light.
Solution: Self-level the subfloor; replace affected planks.
Prevention: Verify subfloor flatness before installation; specify thickness tolerance ±0.05 mm.
Noise Underfoot
Cause: Underlayment omitted; subfloor movement; loose joints.
Symptom: Clicking or creaking sounds; echoes.
Solution: If minor, apply silicone lubricant to joints; if severe, lift affected area and install underlayment.
Prevention: Specify acoustic underlayment (2–3 mm foam) for all installations.
Delamination
Cause: Moisture ingress (subfloor or spills); manufacturing defect.
Symptom: Wear layer or decorative layer separates from the core; visible bubbles.
Solution: Replace affected boards; address moisture source.
Prevention: Install vapour barrier; specify waterproof adhesive; maintain RH 40–60%.
FAQ: Procurement and Engineering Questions
1. What is click lock vinyl flooring installation?
A mechanical, adhesive-free method of assembling vinyl planks (SPC, LVT) using pre-milled tongue-and-groove profiles. The planks are mechanically locked together—angle-angle (20–30° insertion) or drop-lock (vertical engagement)—creating a floating floor system that is not attached to the subfloor.
2. Is click lock vinyl flooring DIY-friendly?
Yes—click lock vinyl flooring is designed for DIY installation. It requires no adhesive, no special tools (only a tapping block, pull bar, and spacers), and can be installed over existing flooring (if flat and clean). However, subfloor preparation (flatness, moisture) is critical—professional installation is recommended for commercial projects.
3. What is the installation speed of click lock vinyl flooring?
150–250 m²/day per crew—40–60% faster than glue-down (100–150 m²/day) and 3–4× faster than tile (50–100 m²/day). For a 100 m² room, installation takes 1–2 days (including acclimatisation and subfloor preparation).
4. Do I need underlayment for click lock vinyl flooring?
Underlayment is optional but recommended—it provides acoustic insulation (reducing impact noise), thermal insulation (warmth), and compensation for minor subfloor irregularities (up to 1.0 mm over 2 m). Some SPC products have an integrated underlayment—check the manufacturer's guidelines.
5. What expansion gap is required for click lock vinyl flooring?
SPC: 15–20 mm gap at walls; LVT: 15–25 mm. Install expansion profiles at 5–8 m intervals for rooms >8 m. The gap must be maintained at all walls, doorways, and fixed objects. Skirtings or transition strips cover the gap.
6. Can click lock vinyl flooring be installed in basements?
Yes—SPC is 100% waterproof and suitable for basements. Install a 6-mil vapour barrier (ground floors), maintain expansion gaps, and seal the perimeter. LVT is also waterproof but has higher thermal expansion—calculate gaps accordingly.
7. Is click lock vinyl flooring suitable for commercial use?
Yes—SPC with 0.55 mm wear layer, AC5 rating, and expansion profiles is suitable for commercial applications (retail, hotels, offices). However, heavy commercial applications (forklifts, wet areas) may require glue-down installation.
8. How do I repair a damaged click lock vinyl plank?
Damaged planks can be replaced without removing the entire floor: cut out the damaged plank (using a multi-tool), slide the replacement plank into place (using a pull bar and tapping block), and secure with adhesive (if required). Replacement is easier than glue-down or tile repair.
Industry Standards and Certifications
Click lock vinyl flooring must comply with relevant international standards.
EN Standard System: EN 13329 (laminate—referenced for SPC wear layer testing, AC rating), EN 14041 (moisture-resistant products—P5/P7 rating), EN 16511 (modular multilayer flooring—SPC and LVT), EN 13893 (slip resistance—R classes), EN 1811 (emission testing—E1 compliance). CE marking under the CPR is required for European markets.
ASTM Testing Methods: ASTM F2195 (dimensional stability), ASTM F964 (vinyl flooring—chemical resistance), ASTM C1028 (slip resistance—DCOF), ASTM E84 (fire resistance—Class I), ASTM D1308 (chemical resistance). For click lock profiles, ASTM F2195 (dimensional stability) is critical.
ISO Quality Management: ISO 9001 (quality management) and ISO 14001 (environmental management) are the minimum requirements for credible manufacturers. ISO 50001 (energy management) may be specified.
Emission Standards: E1 (≤0.124 mg/m³ formaldehyde) is the baseline; CARB Phase 2 (≤0.05 ppm) for North America. Low VOC emissions (≤0.3 mg/m³ total VOCs, ISO 16000) are specified for LEED projects. Phthalate-free plasticisers (DOTP or DINCH) are required.
Sustainability Certification: Recycled content certification (Global Recycled Standard, UL 2799) is available for SPC with 25–50% recycled PVC. LEED credits are achievable with products containing ≥30% recycled content and low VOC emissions.
Significance in Procurement: Verify that the click lock product meets: (a) joint strength (≥800 N/m for commercial), (b) dimensional stability (thermal expansion coefficient), (c) moisture resistance (≤0.5% swelling), and (d) VOC emissions (CARB/E1). Request test reports.
Conclusion: Engineering Decision Logic
Click lock vinyl flooring installation is a rapid, cost-effective, and durable method for residential and commercial applications—but it requires systematic subfloor preparation, acclimatisation, and expansion gap management.
Material and Installation Selection Logic: Choose click lock SPC for residential and commercial applications (retail, hotels, offices) where rapid installation and low maintenance are critical. Specify 5.5–6.5 mm thickness, 0.55 mm wear layer, AC5 rating, and R10–R11 slip resistance. For commercial applications, specify joint strength ≥800 N/m linear and expansion profiles at 5–8 m intervals.
Cost vs Performance Tradeoff: Click lock is 10–20% less expensive than glue-down and 30–50% faster to install. The premium for glue-down (10–20% higher cost) is justified for heavy commercial applications (forklifts, wet areas). For most residential and commercial applications, click lock is the most cost-effective choice.
Risk Priority Judgement: Highest risk is insufficient expansion gaps—calculate gaps correctly and install expansion profiles. Second is subfloor moisture—install vapour barrier and test subfloor moisture. Third is subfloor flatness—verify ≤2 mm over 2 m. Fourth is acclimatisation—48–72 hours is mandatory.
Final Decision Protocol: Test subfloor moisture (≤2.5% CM). Install vapour barrier (ground floors). Verify flatness (≤2 mm over 2 m). Acclimatise product 48–72 hours. Calculate expansion gaps (15–20 mm at walls; expansion profiles at 5–8 m intervals). Install following the protocol—tapping block, full engagement, perimeter seal. Document installation for warranty and quality assurance. Click lock vinyl flooring, when correctly specified and installed, provides 10–20 years of reliable service with minimal maintenance.